This post was made in partnership with Kerrygold Irish Cream. Recipe and ideas are my own.
In lieu of a green drink this year for St. Patrick’s Day, I decided to do you all a favor and create something you’ll want even more. Also, that you can eat. And, yes, there’s booze in there. And some green.
 We’re making Grasshopper Brownies today with Kerrygold Irish Cream. Based on the components of the classic dessert cocktail, The Grasshopper, these decadent brownies are minty, chocolatey, boozy, and so that no one goes into a sugar coma, small batched. A Grasshopper cocktail includes crème de menthe, crème de cacao, and cream, all of which in some form are found in these brownies. So hopefully it goes without saying, but 21+ please!
 These brownies might look like a labor of love, THREE layers! But rest assured, they come together pretty easily. Let’s look at each layer for a minute. First, the base of this dessert is the brownie, which, in my opinion, is the essential layer to all of this. Because I wanted this to be a small batch recipe and only yield about 8, 2″ pieces, I looked to my favorite brownie recipe from Dessert for Two. It only requires one bowl, the microwave does some of the heavy lifting, and it’s just so fudge-y and delicious. This is also the Kerrygold Irish Cream Layer which tics two of the Grasshopper ingredients: chocolate and cream. The flavor of the Kerrygold is present, but doesn’t overpower the brownie itself. I wanted to make sure it was balanced and not too boozy.
 Next you have two different chocolate layers: the green mint layer with crème de menthe, and the chocolate top layer. These require a little more patience and a little stove-top stirring. The green layer can be achieved by one of two ways. Your first option is to add green crème de menthe. Second, you can use peppermint extract (or clear crème de menthe) with green food coloring. If crème de menthe in any color is hard to come by where you are, then peppermint extract can be found through online retailers. And for the final layer, you can optionally add in some crème de cacao to the ganache although I found it chocolate enough for my tastes. Both these layers will set up firm, but not hard.
Note: if you’d like a clean cut, keep these refrigerated until right before cutting. Then, run your knife under hot water, dry and immediately make your cut. Repeat for each cut or when there is brownie buildup on the knife. You can skip these steps if you don’t care if the chocolate layer runs a little into the green.
 Now, will this be the most amazing dessert to bring to your St. Patrick’s Day party? Yes, probably. Will people ooh and ahh about what you made? Definitely. Will you be able to leave with a few spare brownies? I doubt it. But you can make more next week too. Let’s get baking!
 Kerrygold Irish Cream Grasshopper Brownies
Brownie Layer
Adapted from Dessert for Two
4 tablespoons unsalted butter, diced
1/2 cup granulated sugar
1/4 cup + 2 tablespoons unsweetened cocoa powder
1/2 cup Kerrygold Irish Cream
1/4 teaspoon salt
1/2 teaspoon vanilla extract
1 large egg
1/4 cup all-purpose flour
- Preheat the oven to 325, and line a 9 x 5-inch loaf pan with parchment paper. In a microwave-safe bowl, combine the butter, sugar and cocoa powder. Microwave for 30 seconds on HIGH. Stir, and microwave for another 30 seconds on HIGH.
- Stir the mixture very well, and then add the Kerrygold Irish Cream, salt, and vanilla. Stir to cool batter. Next, add in the egg, and stir until its incorporated.
- Finally, add the flour, and stir until combined. Spread the batter into the prepared pan. Bake for 23 minutes, or until a toothpick inserted comes out with fudge crumbs clinging to it. The surface of the brownies is shiny when done and starting to crack. Leave brownies in the pan for assembling the Mint Layer.
8 ounces white chocolate, finely chopped
1/3 cup heavy cream
2 tablespoons creme de menthe or one teaspoon peppermint extract
green food coloring, optional
In a double boiler over medium heat, combine white chocolate and cream. Stir until chocolate is fully melted. Remove from double boiler and stir in creme de menthe (or peppermint extract) and green food coloring if using. Chill for 30 minutes.
Chocolate Top Layer
5 ounces semisweet chocolate
1/4 cup butter, diced
In a double boiler over medium heat, combine chocolate and butter. Stir until chocolate is fully melted. Remove from double boiler. Chill for 30 minutes.
To finish assembly, spread chilled mint layer evenly over brownie layer. Chill 15 minutes. Spread chilled chocolate layer evenly over mint layer. Refrigerate at least two hours or overnight. Cut into squares and serve.


 This post is brought to you by Tequila Cazadores.
 Out of all the drink holidays out there, this is probably one of my favorites. Why? Well, who can say no to a Margarita?! Well made and they’re a perfect blend of sweet and sour, and as I mentioned earlier in the week… SO riffable. To help celebrate, I’ve teamed up with
  Cazadores has been one of my go-to tequilas for quite some time. It’s super reasonably priced but it’s also 100% blue agave—not mixed! Cazadores has five types of tequila in their portfolio: Blanco, Reposado, Añejo, Extra Añejo, and Cristalino; for today’s recipe we’ll be using the Blanco (you’ll recognize the bottle by its hint of blue and the stag gracing the front). Because we’re making a mixed drink, the Blanco expression is the perfect product. It’s light, clean taste has a slightly sweet finish that highlights the agave. It also makes for a balanced cocktail so you taste all the components.
 Now, I can take a bit of heat and I love the play of spicy and sweet here. That said, you can totally adjust this to your spiciness level. Want more spicy? Keep the seeds in the jalapeño slice and add two if you’d like. Just want a hint of spice? Take out the seeds and don’t garnish with a second jalapeño slice (the longer the garnish sits in your glass, the more spice it imparts to your drink! Remember that!).

 This post was made in partnership withÂ
This post was made in partnership with 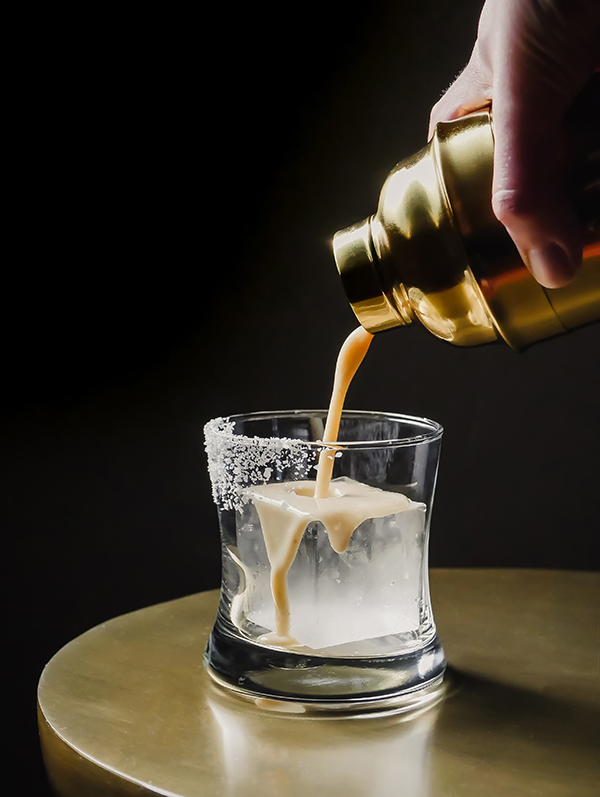 You’ve probably had a spicy Marg, or a skinny one, or a Cadillac, or a frozen, fruity, whatever one. But have you ever had a chocolate one? Before you raise your eyebrows at me, take a moment and I’ll explain.
 First, we’re using mezcal for the base today. Mezcal has a lot of similar flavors that I associate with good quality chocolate: vanilla, tobacco, earthy, nutty, burnt caramel, etc… And while they have these similar aspects, the sweetness you get from chocolate cuts back on the smokiness from the mezcal so they also work together in that respect. But what about the acid needed in a Margarita? How does that work here? And well, I’ll assure you that lime juice still works. The brightness of the lime juice helps keep this from becoming an overly heavy cocktail. To give this an extra chocolate kick and a creamier mouthfeel, I’m adding Kerrygold Irish Cream to the mix. I love how balanced and unexpected the flavor of this is. The mezcal is definitely the powerhouse here but it’s tamed by the richness of the Kerrygold Irish Cream and the sweetness of the chocolate liqueur.
 I note below that the chocolate liqueur should be used to taste. If your bottle is very sweet, as a few brands are, then I’d cut it back to 3/4 ounce. Also, salt is totally optional here. I’m one who likes a little salt to balance out the sweet so I kept my salt rim; you do you though.
 Chocolate Mezcal Margarita
 What is this crazy word you ask?! Well, if your drinks don’t tend to end up in the Tiki spectrum, then you might not be familiar with this cocktail ingredient. OH! But don’t leave us yet! Falernum is a sweet, spicy, and delicious liqueur (or syrup if made nonalcoholic) that can pep up your drinks this winter and we’re going to jump right in and let you decide… drum roll please… whether you should MAKE OR BUY Falernum!
 Our monthly series brings us to the island of Barbados, where our “buy” suggestion, Velvet Falernum, the ubiquitous bottle associated with this particular cocktail ingredient is from. This has been the only alcoholic version available to purchase that I have seen. If you’ve come across another, please let us know! I was first introduced to Velvet Falernum when I started making drinks from
  On the other hand, making Falernum, whether as a lightly alcoholic liqueur or as just a syrup, is fairly easy to do and you might just have most of the ingredients on hand to do so (although I buy whole spices in bulk and often tend to have ingredients like whole cloves available). Besides being easy to make, another pro for a homemade version is that you can make it to your specifications (change out the base rum, more or less clove or ginger, etc…). The con is that it does take a few days to make, will only last refrigerated for about a month, and that from one batch to another it’s not going to necessarily taste the same. Also, you need to invest in some ingredients first to make this. Lastly, as with all the DIY versions, you have to make it. And if that’s a chore, the DIY version is not for you.
 And how do they compare in a cocktail? The quintessential Bajan cocktail is the Corn ‘n’ Oil so of course I tested out the two in this drink. Recipe is below if you’d like to try your own. With the Velvet Falernum version, the drink was lighter in body with a lime heavy flavor. The black strap rum was also more prominent. For the homemade falernum cocktail, the taste was more complex and slightly sweeter with fresh lime and zingy ginger being dominate. The color on each of the cocktails was the same, probably to do with the darkness of the rum overpowering any differences in the color of the falernums.
 A few notes:
 Falernum
 This post was made in partnership with Truvia®. Recipes and ideas are my own.
 My husband and I have been together for over a decade and the thought of going to a crowded restaurant on this particular day makes us both uneasy. We haven’t written off going places or doing romantic things together, we just choose to do them on days when we’re not fighting for a parking space to make a 9pm table (because that was the only reservation left last minute). What we do instead is put a little effort into making each other feel special at home.
 Which brings us to today’s cocktail, a Raspberry Pisco Sour. I am working with
  Using fresh berries here is key. The trick to getting more flavor out of them is to macerate them with the Truvia and let them sit for a little bit. I do that step first and then let the mixture sit while I prep the other ingredients. Also, let’s talk about egg whites here! If you’re new to working with egg whites in cocktails, first, don’t panic. You can buy pasteurized egg whites from the grocery store and use those instead of fresh egg whites. I know where my eggs come from and trust the source so I use whites from whole eggs. If you prefer to make this vegan, you’re lucky, because I have several ways of substituting egg whites for cocktails on the site. The easiest is subbing in aquafaba, which is just the liquid from a can of chickpeas. You can read all about that
  Other than crushing a few berries and either grabbing some egg whites or some aquafaba, this cocktail comes together fairly easily, but it looks and tastes like you put way more effort into it. And you did put some effort into it, so congratulate yourself for that. I think it’s a great drink to make when you want to show someone you think they’re pretty special. And this drink does just that. Cheers!
 Raspberry Pisco Sour Cocktail
 I told my husband that this year I would like flowers, and maybe some burgers, but please don’t buy me a box of chocolates. Still, Valentine’s Day doesn’t seem like a holiday without something sweet. So this year I’ve decided that something light, with a hint of chocolate, and a tart burst of fruit would suit my palate more. And hey, why not throw some booze in there too?
 I’ve teamed up with
  I love a fruit gelée and right now I’m on a passion fruit kick. That sweet-tart golden liquid is a wonderful contrast to the rich, creamy Kerrygold Irish Cream. With a hint of chocolate, real cream and a touch of Irish whiskey, you don’t need to add much to these jellies to make a delicious treat; you just need a little patience.
 A few notes for this recipe: